
How to create an .srt caption file for a video
Let’s say you’re giving a talk, and you’ve been asked to provide a caption file in .srt format along with a pre-recorded video of your talk. How should you create the caption file? You could do it manually in a text editor, but there are also many software tools to help, ranging from those aimed at professional captioners to those developed by and for the anime fansub community. For a lot of folks, a simple and effective approach is to use YouTube Studio, taking advantage of YouTube’s automatically generated captions. Of course, the automatic captions are going to be wrong a lot – that’s where you, the human expert, come in!
So, here are instructions for creating an .srt caption file using a combination of YouTube and your brain. I’m writing them with ICFP 2021 (for which I’m serving as accessibility co-chair) in mind, but my hope is that they’ll be useful for other events, too.
These instructions assume that you’ve already created your talk video, that the audio recording is of good quality with a minimum of background noise, and that you have access to YouTube and have a YouTube account. Parts of this post are based on a guide written by Sumon Biswas for OOPSLA 2020.
-
Sign in to YouTube Studio and upload your video. You can keep the video private; we’re only putting it on YouTube to use the automatic captioning. Choose the appropriate language for the video when you upload it. It will take some time for YouTube to process the video. For a 14-minute video (like ICFP is using this year), automatic captions should be available in an hour or so.
-
Once your video is finished processing, from the left menu in YouTube Studio, select “Subtitles”. You should see a list of videos.
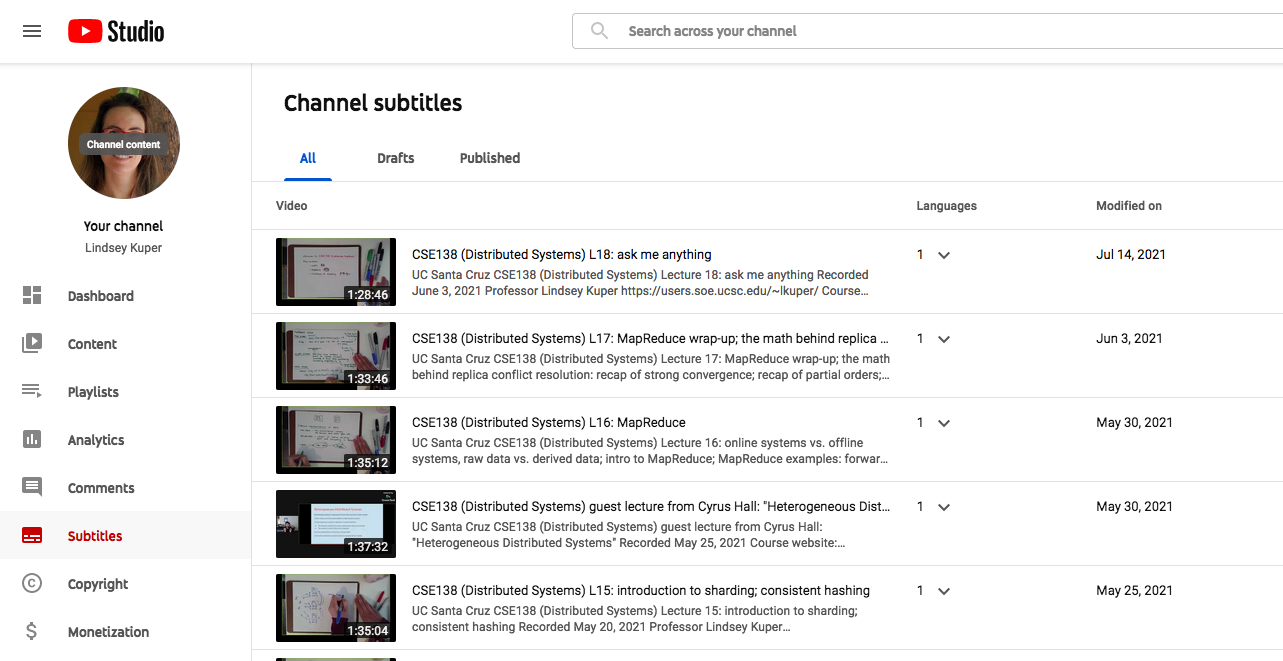
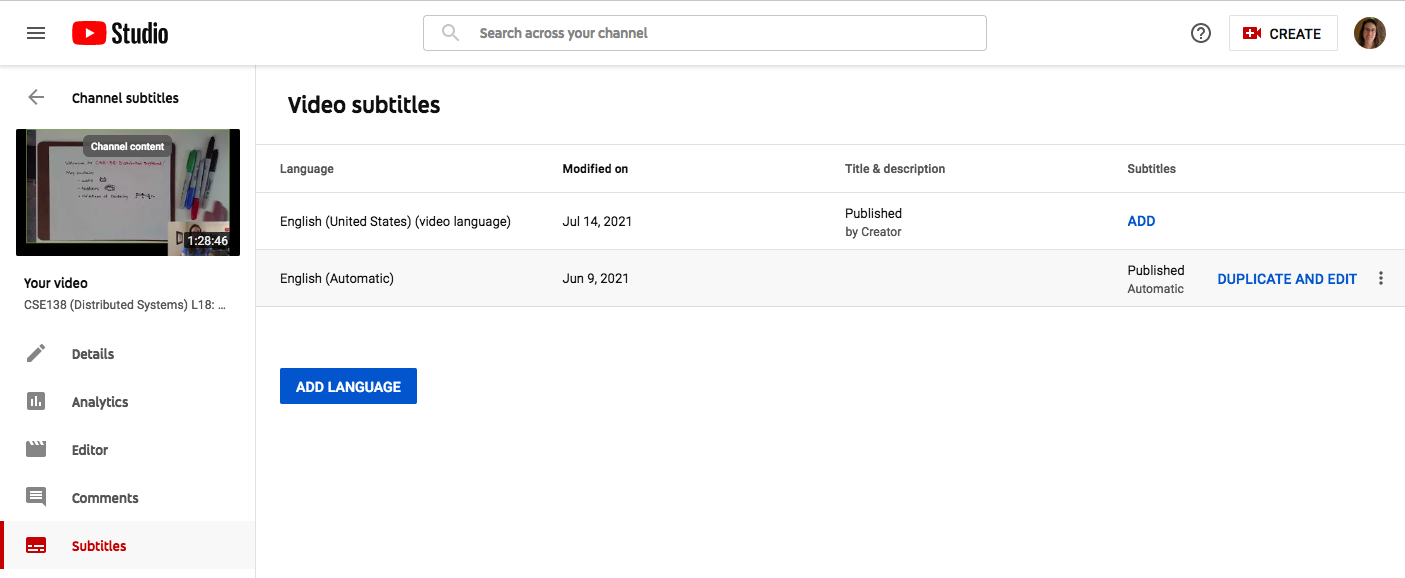
- Select the video you uploaded. At this point, if you haven’t set a language for the video, YouTube will ask you to do so. After the language selection screen, you should see an “English (Automatic)” option in the list. Select “Duplicate and Edit”.
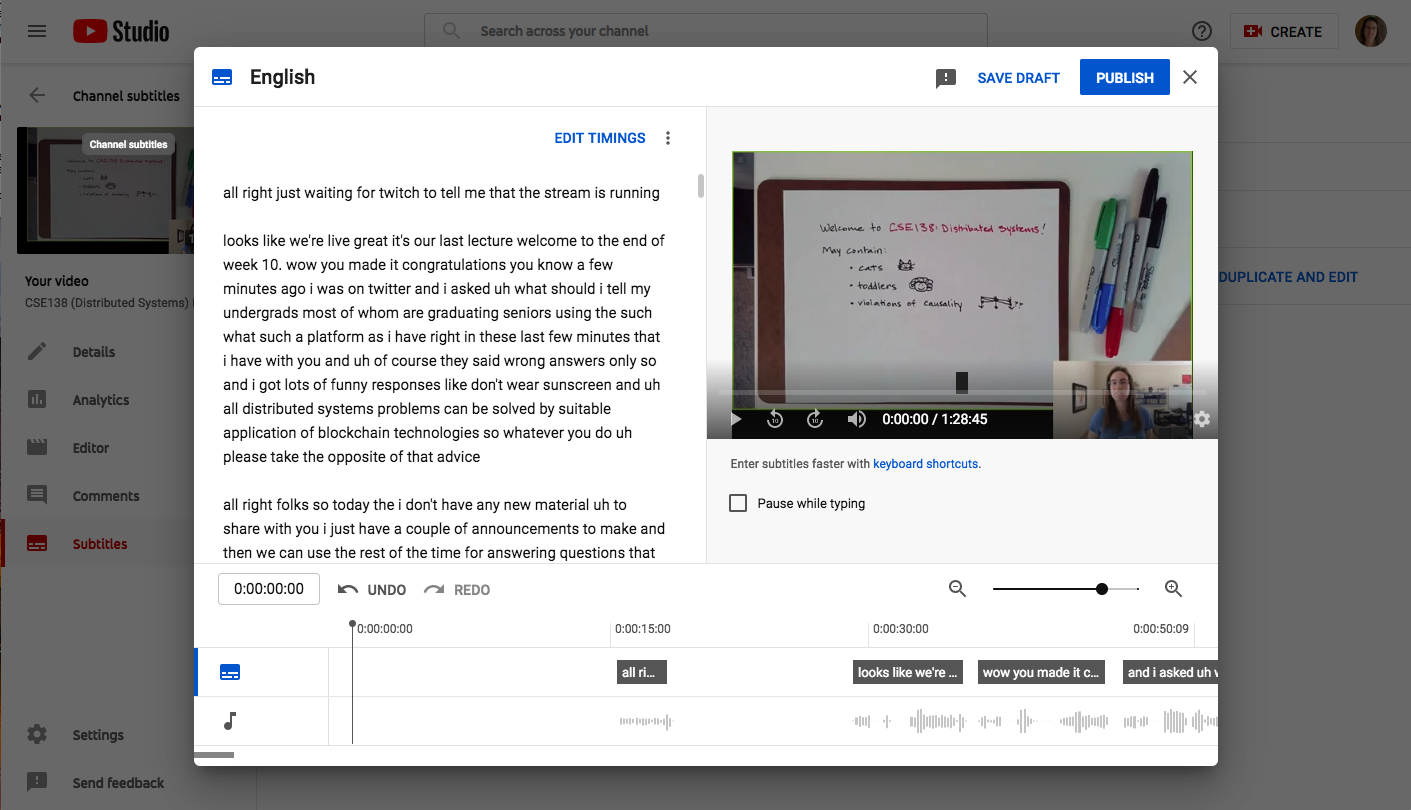
- The caption editor will appear with YouTube’s automatically generated captions. Click any line in the caption track panel to edit the text. You’ll want to correct mistakes and likely also add capitalization and punctuation. Your changes will be automatically synchronized with the video, but you can also edit the caption timings as you see fit. When you’re finished editing your captions, click “Publish” to save your work.
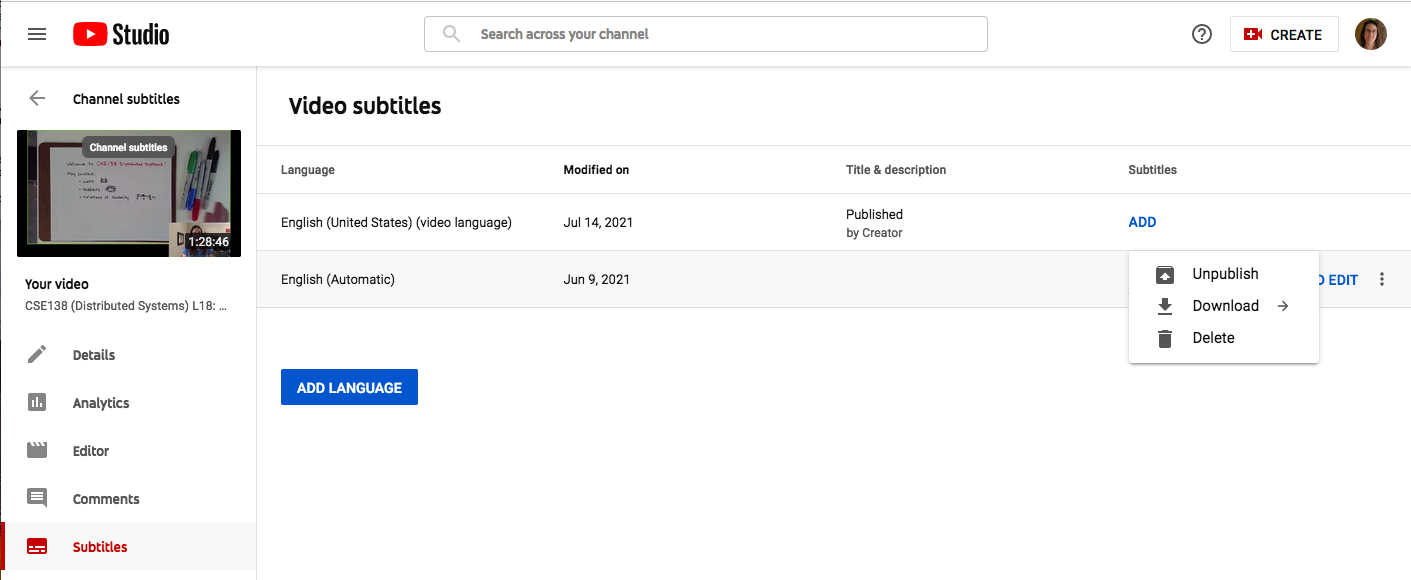
- Finally, for the captions you just edited, select the “…” menu next to “Duplicate and Edit”, choose “Download”, and then choose “.srt”.
You’ll get a caption file in a human-readable file format. For example, here are the first few lines of the automatically-generated .srt file for the last video from my spring 2021 distributed systems course. If you want to, you can further edit the .srt file using your favorite text editor, or any other caption-editing tool of choice. (There’s an Emacs mode for it, of course!)
1
00:00:15,360 --> 00:00:18,000
all right just waiting for twitch to

2
00:00:16,720 --> 00:00:20,320
tell me that the stream is

3
00:00:18,000 --> 00:00:20,320
running

4
00:00:29,119 --> 00:00:34,640
looks like we're live great

5
00:00:32,320 --> 00:00:36,399
it's our last lecture welcome to the end

6
00:00:34,640 --> 00:00:41,040
of week 10.

7
00:00:36,399 --> 00:00:43,280
wow you made it congratulations
I haven’t done any editing of the auto-generated captions above. They’re not too bad! But there’s still no capitalization or punctuation; the vocabulary is pretty simple, without much specialized jargon for the auto-captioning to stumble over; and I happen to speak English with a rather middle-of-the-road American accent. Many videos will not fare so well.
If the auto-generated captions for your video are especially bad, you can replace them entirely. The YouTube captions editor will let you enter captions manually as the video plays (perhaps enabling the “Pause while typing” option to give you more time to enter captions), or you can upload a manually written transcript of your talk to replace them. YouTube will attempt to automatically sync the transcript to your video, but you can edit these timings manually, as well. YouTube has a short video explaining the various ways to use the captions editor.
Finally, if you don’t want to do any of this, another option is hiring a professional captioning service to caption your video. However, keep in mind that even an experienced human captioner is likely to get things wrong if they aren’t a subject matter expert, and you will almost certainly want to edit the resulting captions yourself.1 As a case in point: for last year’s ICFP, we hired a professional captioning service to caption the pre-recorded talk videos. Then, Alan Jeffrey and I personally went through all the talks and made many corrections to the captions, and then, many of the authors made further edits to fix numerous remaining mistakes. Even after all that, I still don’t think the ICFP 2020 captions are problem-free. So this year – following OOPSLA 2020’s lead – the organizing team is asking ICFP presenters to do a bit more work in creating their own caption files, in exchange for what we hope will be better-quality captions for everyone. Captions help make talks accessible to a vastly wider audience, and the better the quality of the captions, the more valuable they are. Thanks for captioning your talk!
-
In my experience, the professional captioners with the most subject matter expertise don’t even take gigs captioning pre-recorded material, because they prefer the challenge of live captioning and the different part of the brain that it uses. ↩
Comments